I'm a little bit obsessed with this jambalaya that I modded from The Gumbo Pages. No photo because it's not attractive, but it's so tasty and not that involved and makes heaps and it's so good. SO GOOD. Being Azn-Australian I dunno how proper/right my version ended up being, but it was really tasty so here's hoping.
Vegan Jambalaya
modified from Creole-style vegetarian jambalaya at The Gumbo Pages
Takes just over an hour; serves 8-10 portions.
Ingredients
half cup olive oil
1 brown onion, diced small
1 red onion, diced small
1 red capsicum, diced small
half butternut pumpkin, peeled, cubed
2 carrots, diced small
2 cups worth of sweet potato, washed but not peeled, cubed
1 zucchini, diced
2 cloves minced garlic
2 tins crushed tomatoes
1 teaspoon cayenne pepper
3 bay leaves
2 tablespoons chilli paste (or MORE if you think your housies won't notice)
some paprika
some salt
half teaspoon dried thyme
half teaspoon oregano
4 cups jasmine rice
several cups vegetable stock (6-8)
half cup tomato paste
300 g soft tofu, cubed
3 vege sausages, chopped
Method
Heat the oil over medium heat, add onions and garlic and saute for five in SO MUCH OIL; then add capsicum, pumpkin, carrot, potato, zucchini for another five. Then add all the spices and the bayleaves, fry up, then add the tomato paste, followed by a bit of stock to deglaze. Add all the tomatoes, bring to a boil, then add the stock and the rice and the tofu and the vege sausages.
If you don't have a pot big enough to contain ALL OF THIS DELIGHT, leave the rice out, and just add as much stock as needed to cover what's in the pot. When you're prepping your rice in your rice cooker, add a scoop from your cooking pot to the rice water. This will help carry some of the flavour across.
Cook the mix for about 35 minutes, without stirring (this is especially important if the rice is in the pot!).
Remove from the heat and let sit for five minutes before serving.
Showing posts with label recipes by others. Show all posts
Showing posts with label recipes by others. Show all posts
Sunday, 15 May 2016
Sunday, 6 March 2016
kylie kwong's cripsy skin duck (for cny)
For the end of the Chinese New Year festivities, I wanted to go fancy and ridiculous, so I veganised Crispy Skin Duck with Blood Plum Sauce from Kylie Kwong's heart and soul book. It was so good. SO GOOD.
 I especially wanted to go duck because CNY isn't the same without duck. When I went home for the first night of CNY this year, my fam and all the meat-eating family friends got to eat duck, and I don't want to miss out on that luck! (In CNY symbolism, duck means fidelity, but also duck in Australia is expensive so sometimes it's wealth via showing off)
I made a bunch of modifications, mostly because a) the shape of vegan cake, and b) I couldn't find blood plums anywhere that day. But I will definitely be making this again and again and again. I want to try it with a bit less liquid and turned into duck pancakes, and I want to eat it on its own, just like this again.
Also at this party: Cindy and Michael made lo bak go and peanut cookies.
ingredients
a vegan duck (i used a 800g one from the cruelty free shop)
1 tablespoon sichuan peppercorns
2 tablespoons salt
a bunch of plain flour
veggie oil
the sauce!
1 cup water
1 cup white sugar
250g ripe blood plums (I used oranges - kylie says the order is blood plums, blood oranges, oranges)
2/3 cup fish sauce (I use Vincent's vegan fish sauce) (I would use less of this next time - too liquidy)
6 whole star anise
2 cinnamon quills
juice of 2 squished limes
what to do
Grind together sichuan peppers and salt until it becomes a 麻辣 salt. Rub the salt into the duck, and leave to marinade in it for a few hours.
Bring water and sugar to the boil, reduce to simmer for five minutes. After it's reduced a little, add plums/oranges (quartered if plums, eighths if oranges), fish sauce, and spices and simmer for a few more minutes. Kylie says just to simmer for one minute but I wanted to reduce it a little more. Stir through the lime juice and take the whole thing off the heat.
Slice your duckie into fingers, and toss in flour. Heat vegetable oil in wok until a clean chopstick pressed to the bottom starts to bubble. (This is a family trick to tell if the oil is hot enough) Deep fry a few pieces at a time until they're crispy and looking good, then drain a little. Arrange prettily and spoon the sauce over it. Don't through it over in an ugly mess because you're in a hurry, as I was.
EAT IT.
Friday, 20 March 2015
lemon myrtle and macadamia nut biscuits
Housemate Bella has some AMAZING biscuit recipes up her sleeve, and this is one of them. It's one of my favourites because a) LEMON MYRTLE, b) we have a lemon myrtle tree. If you don't have a lemon myrtle tree, you can just buy them ground. No pictures because they didn't really turn out but you must eat these ASAP. I'm eating one right now.
Lemon myrtle and macadamia nut biscuits
Lemon myrtle and macadamia nut biscuits
You will need:
200g vegan margarine
100g white sugar
225g macadamias (chopped)
225g flour
some lemon myrtle leaves (fresh or dried)
If you're not using a blender, chop the macadamias and lemon myrtle leaves first.
Method:
Preheat your oven to 200°C
Cream margarine and sugar (in a blender or with a whisk). Add your macadamias and mix until all the pieces are blended in. Mix in your lemon myrtle leaves. Add your flour. Mixture should be a bit crumbly but stick together well.
Roll into balls roughly the size of a golf ball. Put them on a tray greased or lined with baking paper.
Bake for 10-15 mins, until they're a little bit brown on top. Wait until the tray is cool, then put them on a cooling rack.
Saturday, 7 December 2013
brazilian carrot cake of deliciousness (with orange and chocolate)
After a week of watching the Great British Bake Off S4 (I love Sue), it was time to bake Danni's birthday cake. It didn't rise super well and there are things I would change, but a friend said "I never liked carrot cake before, but I loved this!",* and I think that's a job well done.
This cake is moist, fragrant when cut into, and retains a beautiful flavour. The carrot, chocolate and orange all work very well together. I would have baked this again immediately but for a sugar, carrot and flour emergency in my kitchen.
This recipe came to me via Cindy, but I changed it up a bit.
Brazilian Carrot Cake (called such because the recipe's original progenitor is Brazilian)
cake ingredients:
 2 cups plain flour
1 cup sr flour
1.5 tbl baking powder
pinch salt
1.5 cups sugar (I used a combo brown, coconut and castor due to a dire sugar emergency in my kitchen)
400g carrots, coarsely grated
5 tbl soy milk
3/4 cup vegetable oil
1 tsp vanilla extract
half an orange's juice + zest
chocolate deliciousness for the top:
2 tablespoons cocoa
4 tablespoons sugar
2 tablespoons nuttelex
2 tablespoons soy milk
10g dark chocolate couverture
for on top of the top:
some dark chocolate couverture
a handful of walnuts
to make it a cake:
set ovens tostun180C.
sift together flours, baking powder, salt and sugar. in a blender combine carrots, soy milk, vegetable oil, orange elements and vanilla extract. pulse together until a thick, rough, fluorescent orange goop appears. mix through the dry ingredients.
pour into a greased baking tin, and bake for about 40 minutes; at which point, bake at 170C for another ten minutes. allow to mostly cool.
over a low flame, mix together the elements of the chocolate deliciousness. when it's all melted and smooth, allow to boil for a minute and then take off the heat. put aside to cool for about 5-10 minutes, stirring occasionally.
chop up the walnuts, shave the chocolate. before the chocolate deliciousness can set, pour gently over the cake. top with walnuts and extra chocolate.
serve at your bestie's birthday dinner, and be annoyed when there's none left to eat later because everyone gobbled it up despite being full of burgers.
* where do we think this comma goes? '!",' seems awkward.
This cake is moist, fragrant when cut into, and retains a beautiful flavour. The carrot, chocolate and orange all work very well together. I would have baked this again immediately but for a sugar, carrot and flour emergency in my kitchen.
This recipe came to me via Cindy, but I changed it up a bit.
Brazilian Carrot Cake (called such because the recipe's original progenitor is Brazilian)
cake ingredients:

1 cup sr flour
1.5 tbl baking powder
pinch salt
1.5 cups sugar (I used a combo brown, coconut and castor due to a dire sugar emergency in my kitchen)
400g carrots, coarsely grated
5 tbl soy milk
3/4 cup vegetable oil
1 tsp vanilla extract
half an orange's juice + zest
chocolate deliciousness for the top:
2 tablespoons cocoa
4 tablespoons sugar
2 tablespoons nuttelex
2 tablespoons soy milk
10g dark chocolate couverture
for on top of the top:
some dark chocolate couverture
a handful of walnuts
to make it a cake:
set ovens to
sift together flours, baking powder, salt and sugar. in a blender combine carrots, soy milk, vegetable oil, orange elements and vanilla extract. pulse together until a thick, rough, fluorescent orange goop appears. mix through the dry ingredients.
pour into a greased baking tin, and bake for about 40 minutes; at which point, bake at 170C for another ten minutes. allow to mostly cool.
over a low flame, mix together the elements of the chocolate deliciousness. when it's all melted and smooth, allow to boil for a minute and then take off the heat. put aside to cool for about 5-10 minutes, stirring occasionally.
chop up the walnuts, shave the chocolate. before the chocolate deliciousness can set, pour gently over the cake. top with walnuts and extra chocolate.
serve at your bestie's birthday dinner, and be annoyed when there's none left to eat later because everyone gobbled it up despite being full of burgers.
* where do we think this comma goes? '!",' seems awkward.
Wednesday, 23 January 2013
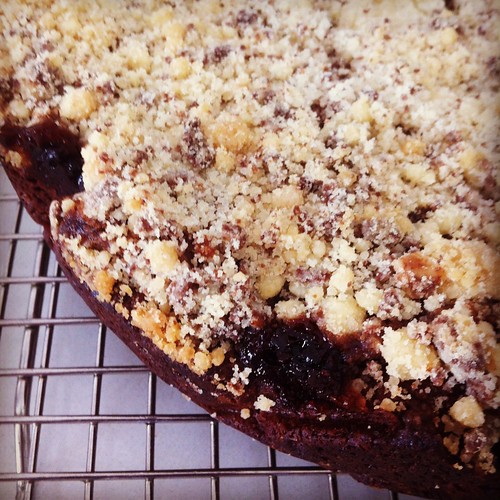
berry and chocolate slice
The super awesome Fi bought the also awesome Danni the Vegan Junk Food cookbook for her birthday, and then it sat on the shelf for a month until I decided something needed to be cooked from it. I was, as I often am, keen to bake something but completely uninterested in leaving the house, so I picked the white chocolate raspberry bars (pg 205), and then modified them to work with what I had in the house and what I felt like.
I've tried a couple of other recipes from Vegan Junk Food; book review coming soon!
And they turned out sweet, but excellent. Seriously, so sweet I needed water or black tea to drink with it to offset the sweetness, but if sweetness is your thing please feel free to go with it.
I used a combination of strawberry, raspberry and mixed berry jams, because that was what I had in the house (there is a surprisingly large amount of jam in my fridge), but I suspect just about any jam would work. I have a pear and blackberry from Babka's that I particularly want to try in it.
I've tried a couple of other recipes from Vegan Junk Food; book review coming soon!
berry and chocolate slice
modified from the white chocolate and raspberry bars in vegan junk food
you will need:
1 cup sugar
3/4 cup margarine and/or copha
2 tablespoons plain oil (canola or similar)
1 teaspoon vanilla
shake of salt salt
2 and a half cups of flour (I used a mix of plain and baking)
1 teaspoon baking powder
100g chocolate
half cup applesauce
1 cup of raspberry jam
so then:
Preheat the oven to 175C!
With a fork, beat the sugar, vanilla, oil and margarine (melt the copha if you're using it and be prepared to wait one million years). Add in the flour and mix until crumbly. You may want to use your hands for this. When it's all crumbs, set aside a heaped cup of this mixture.
Melt the chocolate, and add this and the apple sauce to the bigger portion of the crumb mixture. Mix it all together and then press into a lined square tin.* Bake this for 12 minutes, then remove from the oven, spread the jam over it, and sprinkle with the remaining crumb mix. If you had any more chocolate lying around the house you could put some on top, but I ran out.
Bake for 25 minutes, and allow to cool completely before cutting. It'll still fall apart a little anyway, but it's better this way.
Variants: desiccated coconut on top of the crumbly topping.
*I used a circle tin but only because while I was in China my square tin went missing !!!
Tuesday, 1 January 2013
ginger and five spice biscuits
So we went vegmeling to celebrate the end of the year, and one of the things I made were Catherine's Gingernut and Five Spice Biscuits. Well, sort of. And in a few different variations.
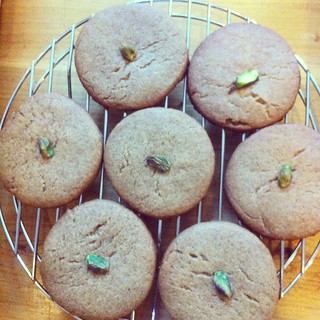
First I made them in the Friends of the Earth kitchen, using ingredients found in the FoE Melbourne food co-op, which meant all sorts of substitutions. Then, after beautifully and successfully doing that (pictured above), I went home and did it all again, only this time much closer to the original recipe but gluten free, which included sitting on the floor of my kitchen stone grinding star anise for the five spice.
The gluten-free version, with the original treacle and golden syrup, caramalised the recipe when it was baking and made it crunchy and gingernutty. The FoE version, with its agave syrup and coconut butter, was softer, more like a gingerbread biscuit in texture, and more spicy, I think enhanced by the agave.
I enjoyed the more original recipe, but I loved my revisions, so I copy them below.
This recipe is very flexible, it took me over an hour to put together what with constant interruptions in the Co-op, often leaving the batter half mixed in the heat. When it got too gloopy I dropped it in the fridge for five minutes, where it dried out quickly (because I forgot to cover it) but was easier to manage.
For gluten-free, just do a direct orgran's substitute. All good! And make sure your five spice is gluten free - it often isn't, even if it doesn't admit it on the pack.
For gluten-free, just do a direct orgran's substitute. All good! And make sure your five spice is gluten free - it often isn't, even if it doesn't admit it on the pack.
Ginger and Five Spice Biscuits
Modified from Catherine
ingredients
200g bakers flour or SR flour (or a combination of the two)
100g coconut butter (originally nuttelex/butter/margarine thing)
100g coconut butter (originally nuttelex/butter/margarine thing)
75g brown sugar
90g dark agave
30g light agave
2 tablespoons of Chinese five spice mix (mostly this was because I misread teaspoons instead of tablespoons, but I loved the added flavour so kept it)
2 tablespoons of ground ginger
halfish a teaspoon of bicarb
method
Melt the cocoa butter, and combine with the agave and the sugar. Add in all the other ingredients, and mix so it's even. Roll the biscuits to about a centimetre thick, and cut out into biscuits (I used a glass tumblr). Place on a lined or greased baking tray, and bake for 9-12 minutes at 180C. Allow to cool, then eat.
After much deliberation and consultation with other people in the co-op that day, I elected to put a pistachio nut into the centre of each biscuit. You could also use a sultana or a goji berry or anything like that. Or elect not to put in anything.
Sunday, 2 October 2011
planet vegmel birthday potluck + blog event part ii
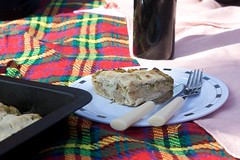
It was Planet VegMel's birthday! So there was a birthday picnic at Edinburgh Gardens, and the weather was beautiful. I took a whole bunch of photos at the picnic, if you'd like to see them you can check them out at my flickr. Cindy has also done a bit of a round up post!
There were zines (which you can download here)

and badges

and there was lots of food!
For drinks, we started with chamomile lemon iced tea, with maple ice cubes, made by K; and a mango lasso made by the Veganator.
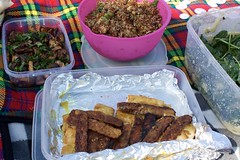
Michael made potato chickpea enchiladas, originally seen on veganise this; Emilly made an eggplant salad; and I made the quinoa avocado salad that has been remixed by many VegMelers.
Toby experimented with tempeh bacon, remixed from Where's the Beef. This was probably my highlight of the picnic, I totally recommend it! Also involving tempeh was Em's gado gado.
In news of other remixes, Carla brought along mock crab cakes, remixed from Cindy and Michael; and Mel made tofu quiches, originally seen at Vicki Vegan and Green Gourmet Giraffe.
Danni made sundried tomato bread and pumpkin + miso muffins (remixes from non-VegMel blogs).


For sweets, Cindy and Michael made PB & choc sandwiches, based on peanut butter alligators and chocolate ganache from Sugarspoons.
K made ginger ripple cake, based on a recipe by the Veganator; Mel made apricot delight, remixed from Green Gourmet Giraffe; and Em made Turkish Truffles, a remix of Mel's rum balls. I remixed chocolate caramel slice, from Johanna's original recipe.
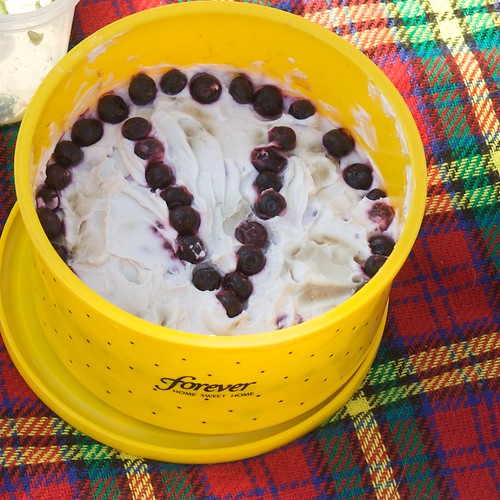
In original recipes, Vicki posted about her peanut butter balls; Johanna brought blueberry cake pops (and they were so amazing); and Carla delighted us with lamingtons.
And that was the potluck, but not the end of the birthday:
two more submissions for that recipe sounds very familiar… previous entries can be found here.
Cindy and Michael remixed a beetroot chocolate cake, originally from the Fairest Feed.
Like Cindy and Michael and myself, Mel remixed Toby's Singapore noodles, a delicious noodle treat.
Wednesday, 21 September 2011
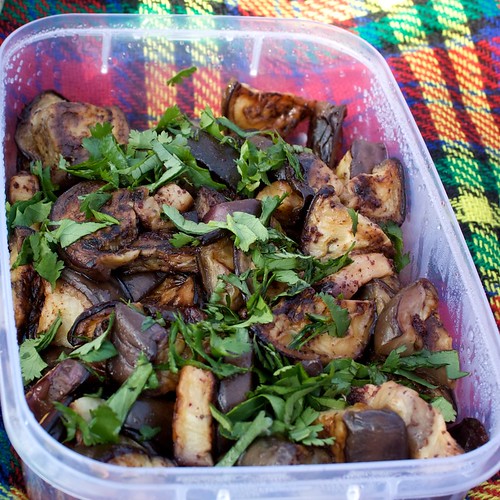
eggplant salad
emilly made an eggplant salad as her savoury contribution to the planet vegmel picnic. it was super tasty, and filled the house with the smell of eggplant that was a) delicious and b) not cooked by me, which i like (cooking eggplant makes me nervous). she is not really a food blogger, so i have volunteered to blog the recipe on her behalf!
eggplant salad
this is a little bit inspired by greg + lucy malouf's soused zucchini recipe, so you could probably make this a zucchini salad, if you were that kind of person (i am not. well, not in salad).
ingredients
1 medium sized eggplant
lots and lots of salt
olive oil
1 tablespoon lemon juice (or red wine vinegar)
1 teaspoon castor sugar
2 teaspoons sumac (plus some extra, if you like)
fresh coriander and/or parsley
method
cut up the eggplant. thinnish slices is best but emilly did it in chunks, and was then cursing the chunks during the entire cooking process. put the eggplant into a colander with lots of salt on each surface; put a plate on the top and some cans to weigh it down and press the eggplant, and leave for at least half an hour.
rinse the eggplant off, pat it dry with a paper towel, and then get more paper towel ready so you can drain the eggplant. fry with what seems like a painful quantity of oil. if you sliced it, you could probably brush each side with some oil so that you don't end up using equal quantities of oil and eggplant, but it cooks nicer and faster with plenty of oil.
for the dressing, combine lemon juice, sugar and sumac. mix together the eggplant and the dressing. this can all go in the fridge if you have prepared it in advance! then when it is time to go to the picnic/serve the salad, add some chopped parsley and/or coriander and sprinkle it over the top!
Tuesday, 20 September 2011
chocolate caramel slice
For the Planet VegMel Picnic (more on the picnic later) I made chocolate caramel slice, originally seen on Johanna's blog. I had quite a different experience than Johanna. She worried that the base was too crumbly, that she might have overcooked the milk because it didn't look right, and too liquidy a chocolate layer. I on the other hand had a lovely time. The base pressed in quite well, and I've never used condensed milk of either the dairy or soy variety previously, so had no idea if it was working and just went with it; and the chocolate was a perfect consistency. And it turned out well! Very crunchy, and the base was a bit high (I used a 20x20cm tin instead of 20x30, and that was a mistake), but overall it was an easy and delicious experience. And at the end of the picnic there was only one lonely piece of slice left!
I also made this gluten free, with a direct substitution of Orgran's GF flour for the flour in Johanna's recipe. I didn't even add extra liquid the way I usually would with a GF conversion, and it turned out just fine.
This is a picnic submission for that recipe seems very familiar...

chocolate caramel slice
originally at Green Gourmet Giraffe
base
1 cup dessicated coconut
1 cup brown sugar
quarter of a container of nuttelex (125ish grams)
1 cup GF flour
caramel layer
330g soy condensed milk (or 1 tin)
2 tablespoons or so of golden syrup (I didn't measure, just squeezed the tube until I got bored of squeezing)
30g nuttelex
chocolate topping
150g dark chocolate
1 tablespoon vegetable oil
Base: mix all the ingredients and press into a lined tin. Bake at 180C for 15-20 minutes.
While the base is in the oven, in a small saucepan over a lowish medium heat, constantly stir all of the caramel ingredients until it has thickened and is a light golden brown. Hopefully the base will be ready just as the caramel is, because then you can pull it out, spread the caramel over it, and shove it back in the oven. At the same 180C temperature, bake for 10 or so minutes until it's a deep golden brown. Mine went very brown, but it wasn't burnt and it was all okay. Set this aside to cool and go about your business.
When it's cool, melt the chocolate and mix in the oil. Spread it over the caramel layer, and leave it in the fridge to set. I left mine over night. I then brought it to room temperature before cutting.
Cut it small because it's quite sweet!
I also made this gluten free, with a direct substitution of Orgran's GF flour for the flour in Johanna's recipe. I didn't even add extra liquid the way I usually would with a GF conversion, and it turned out just fine.
This is a picnic submission for that recipe seems very familiar...
chocolate caramel slice
originally at Green Gourmet Giraffe
base
1 cup dessicated coconut
1 cup brown sugar
quarter of a container of nuttelex (125ish grams)
1 cup GF flour
caramel layer
330g soy condensed milk (or 1 tin)
2 tablespoons or so of golden syrup (I didn't measure, just squeezed the tube until I got bored of squeezing)
30g nuttelex
chocolate topping
150g dark chocolate
1 tablespoon vegetable oil
Base: mix all the ingredients and press into a lined tin. Bake at 180C for 15-20 minutes.
While the base is in the oven, in a small saucepan over a lowish medium heat, constantly stir all of the caramel ingredients until it has thickened and is a light golden brown. Hopefully the base will be ready just as the caramel is, because then you can pull it out, spread the caramel over it, and shove it back in the oven. At the same 180C temperature, bake for 10 or so minutes until it's a deep golden brown. Mine went very brown, but it wasn't burnt and it was all okay. Set this aside to cool and go about your business.
When it's cool, melt the chocolate and mix in the oil. Spread it over the caramel layer, and leave it in the fridge to set. I left mine over night. I then brought it to room temperature before cutting.
Cut it small because it's quite sweet!
Thursday, 15 September 2011


Wednesday, 14 September 2011
that recipe sounds very familiar... part one
It's Planet VegMel's 2nd Anniversary! Happy Anniversary, Planet VegMel! It's been an exciting two years for the Planet, I think, as it's grown as a resource. And there are still lots more ways in which it can grow, not just in number of blogs subscribed, but lofty goals for mapping and referencing and all sorts of exciting things.
As part of the birthday celebrations, I am super proud to host the 'That Recipe Seems Very Familiar…' blog event. A number of VegMel bloggers have remixed the recipes of other VegMel bloggers, ranging from minimal alterations to huge variations of deliciousness.
The recipes linked below have been submitted in advance of Planet VegMel's 2nd Anniversary. But if you've got something to submit, this doesn't close you out! I'll be making a second round up post next week, some time after the Birthday Picnic Potluck (this Sunday at Edinburgh Gardens), so that anyone who wishes to remix something for the Potluck can do so. And I hope to see you there! (keep an eye on the Facebook event if the weather looks grim, for the backup plan)
In chronological(ish) order!
Mel at Veganise This has remixed the haggis (and haggis pizza) originally posted by Johanna at Green Gourmet Giraffe.
Cindy and Michael remixed kari kapitan, originally blogged by Steph (me!) at Vegan about Town.
I remixed the potato boston bun, also originally by Johanna at GGG.
Cindy and Michael remixed cottage tofu, originally by Johanna.
Cindy and Michael remixed the very familiar baked cherry/berry cheesecake, seen previously at Gretal Getting Fatter, Easy as Vegan Pie, and vegan about town! (it's totally an amazing recipe)
K remixed salted caramel ice cream, adapted from Cindy and Michael.
I remixed lemony snickerdoodles, originally at Sugar Spoons.
Johanna remixed the baked beans recipe, previously seen at veganise this! and where's the beef, and originally from Veganomicon.
Mel remixed delicious tofu with steamed vegies, adapted from In the Mood for Noodles. And then Johanna remixed it too!
Cindy and Michael remixed cauliflower and caramelised onion tart, originally made by Carla at Easy as Vegan Pie, and previously remixed by Lisa.
In news of more noodles, K remixed a meegoreng originally seen at vegan about town.
Cindy and Michael remixed Toby's Singapore noodles; and two days later, so did I! (because we all love noodles)
Cindy and Michael remix hash browns, originally by Vicki Vegan.
I remixed lemon pepper cashews, dubbed "cashew crack" by Cindy and Michael.
K tries out apricot delight, seen on Green Gourmet Giraffe.
K remixed Zucchini Quinoa Lasagna, originally seen on Vicki Vegan.
Em made almond jam slices, a somewhat a remix of my coconut and jam slice.
Thanks to everybody for participating in this event! It allowed me to rediscover some old favourites, and discover new things (lemon pepper cashews are AMAZING).
Tuesday, 13 September 2011
lemon pepper cashews
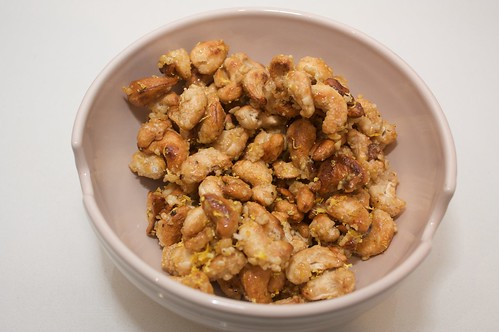
I was bouncing around the house on Sunday night, all my chores completed and mainlining some television, when I thought I'd give this recipe for a cashew snack by Cindy and Michael a go. I wasn't sure about the lemon-salt-pepper-sugar combo, but their blog declared them 'universally addictive' and who am I to go past a description such as that?
They're so amazing that I left the container on the table with an airy instruction to Danni that she could try a couple, if she wanted; when I got back from my adventures in town, I discovered she'd eaten over half! It's a good thing they're easy and fast to make. A brilliant and delicious snack!
This is another remix for that recipe seems very familiar...
lemon pepper cashews
originally at Where's the Beef
ingredients
1 cup raw cashews
quarter cup sugar
salt and pepper to taste (generous portion - I was a bit timid and it definitely could have done with more)
zest of a medium-sized lemon
method
In a frypan over a medium-high heat, start stirring the cashews and the sugar. When the sugar starts to melt, lower the heat and keep stirring until the sugar is completely melted and the nuts are a lovely golden brown and completely covered in sugar. Turn off the heat and crack through some salt and pepper, then stir through the lemon zest.
Spread the cashews out on a lined baking tray and leave to cool. The baking paper is important, as the sugar will have started to caramelize and you don't want to lose any of its deliciousness from being stuck to a tray! Store in an air-tight container. Or eat them all.
Sunday, 11 September 2011
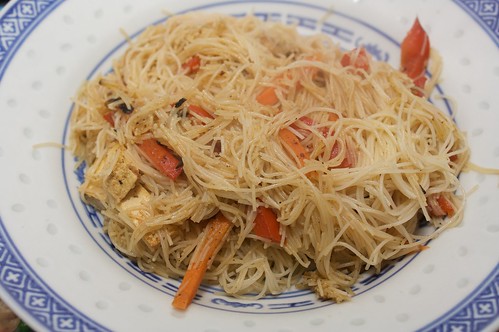
toby's singapore noodles
I was reading twitter yesterday morning, blearily trying to wake up, when I saw that Cindy and Michael had remixed Toby's Singapore noodles. I was torn, because I had wanted to post about it and suddenly I worried I'd look like a copy cat! But several people remixing is part of what remixing is all about! And also we all love noodles, and it's nice to share.
So here it is, my remix of Toby's Singapore noodles, for that recipe seems very familiar... Like Michael, I skipped the sesame seeds, but not because I didn't have them, because I forgot them (even though they were on the kitchen counter).
Singapore Noodles (Toby Style)
originally by Toby at In the Mood for Noodles
ingredients
2 sticks of rice vermicelli
100 grams smoked tofu
1 medium carrot, julienned
a hunk of capsicum, similarly sliced
half a white onion, sliced
3 tablespoons curry powder
half a teaspoon chilli flakes
quarter of a cup of vegetable stock
some vegetable oil
a splash or three of sesame oil
a splash or three of light soy sauce
some tumeric powder
method
Soak the rice noodles in hot water for five to ten minutes. Don't oversoak them, because then it will all fall apart and there will be maifun-related tears. In the meantime, marinate the carrot and the capsicum in the soy sauce, chilli flakes and the sesame oil.
After you drain the noodles, heat up the wok until it's very warm and fry the onion in some oil. Fry it until it softens, then stir through the curry powder and the turmeric, and follow it up with the carrot and capsicum mixture, including all the liquids. Leave to fry until the carrot starts to soften. Add a little dash of water and put the lid on to let it fry and steam for another minute or two. Throw in the noodles and mix through, adding the stock, a little extra soy sauce, sesame oil and some cracked pepper until the stock is cooked off (the wok should be hot enough that this will take about thirty seconds). I love sesame oil, it is amazing.
Tuesday, 6 September 2011
lemon snickerdoodles
Over the weekend I was compelled to provide some sort of baked treat for a short-notice afternoon tea, and remembered this lemony snickerdoodle recipe that was originally posted by Em. A quick glance revealed I had all the required ingredients and, clad in my pyjamas, I felt ready to tackle this baking need.

I made a few modifications to this recipe. Chief amongst them is that I didn't finish with lemon icing, it was more of a lemon glaze - I suspect that the '3/4 of a lemon' that Em used was a little smaller than the lemon I picked up from the corner shop, because I tripled the icing sugar in the recipe and it was still gloopy. I ended up brushing the glaze onto the snickerdoodles, but don't fret - it all ended well. And now I have three quarters of a cup of lemon glaze in my fridge, if anyone has any ideas.
These went pretty soft very quickly - good for the day of, but not as amazing by the end of the second day. Just have to eat them quickly, what a hardship!
This is my second submission for the that recipe seems very familiar... blog event.
lemon snickerdoodles
originally from sugar spoons, modified from vegetarian times
the dough
1 3/4 cup plain flour
1/4 cornflour
1 teaspoon baking powder
30 grams nuttelex, softened
a smidge over a quarter of a cup of soy milk (with a few drops of vanilla extract mixed through)
1 teaspoon vanilla essence
quarter cup castor sugar
1 teaspoon cinnamon
the glaze
zest + juice of most of a medium to large lemon
a whole lot of icing sugar
method
Preheat the oven to 180C. Em suggested lining one baking tray, but I needed two (and got about 20 snickerdoodles out of it).
Beat together the nuttelex until it's soft, then beat in the sugar, followed by soymilk and vanilla essence. In a separate bowl, mix together the flour, corn flour and baking powder, then slowly mix this all into the liquids until smooth. You may need to use your hands! Set aside to sit for ten minutes.
In a bowl, combine the sugar and cinnamon.
Form the dough into 1 inch balls, roll into the cinnamon sugar, and place it on the tray. Flatten the cookies! Bake for 12-15 minutes, until the cookies are starting to go a little golden. Transfer to a cooling rack and let cool for a bit.
Make the glaze! Combine lemon zest, lemon juice, and icing sugar until you're happy with the consistency. Brush (or dollop, if it's thick enough) onto the snickerdoodles, then sprinkle any remaining cinnamon sugar on top.
Saturday, 3 September 2011
potato boston bun
When Emilly and I were invited to dinner with Ger + Em and asked to provide some dessert at short notice, I was stricken with indecision. But with the blog event for VegMel's 2nd birthday, it seemed fortuitous to tackle one of the recipes I've had bookmarked for months.
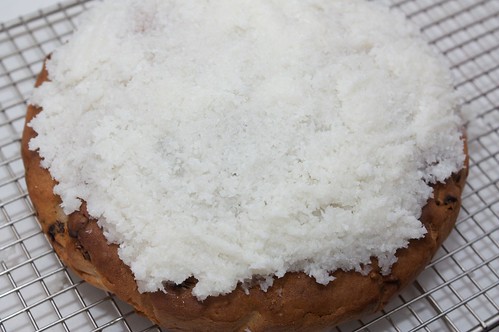
My first recipe for the birthday blog event (you should participate too!) is this potato boston bun recipe, first blogged by Johanna at Green Gourmet Giraffe. Ever since Johanna first posted it, I had been intrigued and definitely willing to give it a go. I love boston buns, and I love potatoes, how could this not be a great combination?
I made only a few minor mods to this recipe, increasing a few proportions and decreasing a few others, but mostly keeping it all the same. It was delicious on the day, and still delicious this morning, with a little nuttelex.
potato boston bun
based on the recipe at Green Gourmet Giraffe, originally from the ABC
ingredients for the bun
2 small white potatoes, peeled and mashed
three quarters of a cup of castor sugar
2 cups self raising flower
1 cup soy milk
1 teaspoon mixed spice
1 cup mixed fruit
ingredients for the icing
three quarters of a cup of icing sugar
three quarters of a cup of desiccated coconut
a few drops of vanilla essence
2 tablespoons of hot or even warmwater
1 tablespoon nuttelex
the method of bunening
Preheat the oven to 200C.
Mix together the potato and the sugar. Mix in the flour, mixed spice, and soy milk. When it's all smooth (though there can be a few potato lumps), add the fruit and loosely combine. Pour into a lined circular tin and smooth the top around.
Bake for about 50 mins until golden brown and firm to the touch. When you put the skewer in to test, it can be a little not-quite done, it'll cool deliciously.
Remove from tin and allow to cool.
For the icing, mix together the icing sugar, coconut, vanilla essence, nuttelex and the hot water. Mix it thoroughly until a spreadable paste is formed. Add more hot water if necessary. Spread it over the top of the bun.
Cut and eat, oh yeah.
Sunday, 22 May 2011
(not actually a) mississipi mudcake
Following a discussion around the existence of vegan mudcake, I was provoked in to committing acts of the same, guided by this Mississippi mudcake recipe on vegweb, and goaded on by Certain Vegans.
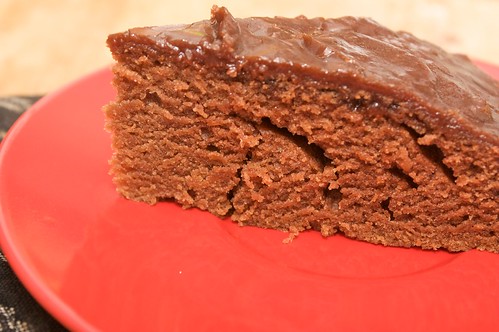
This cake was good. It had a lovely flavour, lovely consistency and texture and was easy to bake and held up well over a few days, but it was not mudcake. It was too light and fluffy and not filled with any molten chocolate at all! However it is a recipe I would repeat, and I have ideas for transforming it in to mudcake.
I made no mods! Which is terribly unlike me.
Monday, 14 March 2011
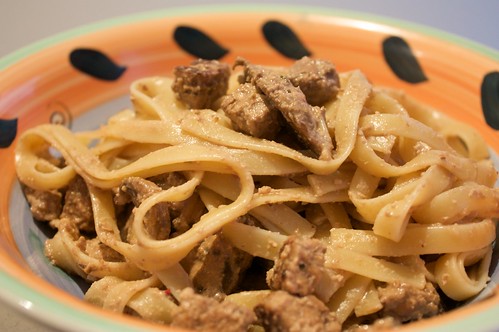
walnut + mushroom pasta (with bonus tempeh)
I was skeptical, at first, but it turns out a creamy pasta made from walnuts and featuring soy sauce is actually really delicious! I saw this originally at Seitan is my Motor and have modified it a bit, but I suspect the original deliciousness is still there! This wasn't too complicated, though it did make quite a few dishes.
walnut + mushroom pasta
modified from seitan is my motor
ingredients
quarter of a cup of light soy sauce or tamari sauce
200g plain tempeh
three quarters of a cup of walnut halves or walnut pieces
1 chilli
just over half a cup of rice milk
1 clove garlic (minced) (or a teaspoonish of minced jarred garlic)
some oil (canola is fine, though olive is better. margarine/nuttelex is also okay)
1 teaspoon paprika
a shake of thyme
a shake of marjoram
350 - 400g fettucine
eta: and mushrooms!
method
Dice the tempeh small, then soak in the soy sauce for about half an hour. If it soaks up all the soy sauce, add a little bit more. Make sure it's light soy! If you use dark soy then there will be tears. Sometime during this half an hour, set the pasta on to boil. When the pasta is done, drain, but reserve a smidge of the water.
In a blender, blend the walnuts with the milk, the garlic and the chilli. Slice the mushrooms. In a pan, saute the tempeh (with any leftover soy sauce in which it was soaking) in a little oil or nuttelex, until it starts crisping, then add the mushrooms. Saute these until they are almost cooked through, then throw in the walnut mixture, plus the paprika, thyme and marjoram. Simmer for five minutes or so, until it has started to thicken (...more) and then throw in the reserved pasta water. Let it all simmer through, then combine with the pasta and a swish of lemon juice, and serve piping hot.
The soy sauce combined with the tempeh and the walnuts to be amazing, and the addition of the chilli was perfect! If you want to reheat it, toss through a little lemon juice.
Tuesday, 8 February 2011
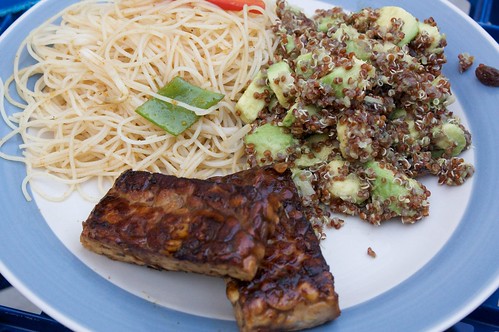
some salads and things
Ages and ages ago Em blogged about this quinoa avocado salad, and I promptly forgot about it until Michael also blogged about it.
I totally slacked off, using lemon juice (from a bottle!) instead of lemons with their zest, and I skipped the coriander and increased the amount of sultanas slightly. I also neglected to toast the sesame seeds, because I was trying to keep my dishes down.
I served this with some tempeh (over-marinated, I'm sad to report) and a curry-ish noodle salad (inspired by Gen at FoE, but unlike hers mine was a complete failure).
Monday, 7 February 2011
My Very First Quiche

I've never made quiche before, and this was my first attempt. It was amazing. Try it - you won't regret it.
my very first quiche
inspired by Eat More Vegies
ingredients
1 cup chickpea flour
1 and a half cups of water
olive oil
2 tablespoons nutritional yeast
small amount of dried basil
handful fresh basil
2 tomatoes, sliced thinly
quarter of a red onion, diced tiny
1 sheet puff pastry, thawed
some vegan parmesan, if you have it (totally optional)
method
Grease a tray, and line it with baking paper. The tray I used was square and about 20x20cm. Press the puff pastry in to the tray, prick it with a fork once or twice, and in a preheated oven bake for 10 minutes at 220C.
Beat together the flour, water, oil, nutritional yeast and dried basil, as well as a little salt and pepper if that takes your fancy. Pour a little bit of this mix in to bottom of the puff pastry. Throw in (or layer in, as it takes your fancy) some of the onion and tomato, then pour in the rest of the batter. Set out the remaining onion and tomato on top, as well as the fresh basil leaves.
If you have any vegan parmesan, sprinkle this on the top.
Bake for about 40 minutes, until it's golden and quiche-like.
AMAZING.
Sunday, 6 February 2011
apricot and apple braid of deliciousness
I have been thinking about this apricot and apple braid ever since I first stumbled across it, and during a cooler day I managed to finally buy some apricot jam and give it a go.
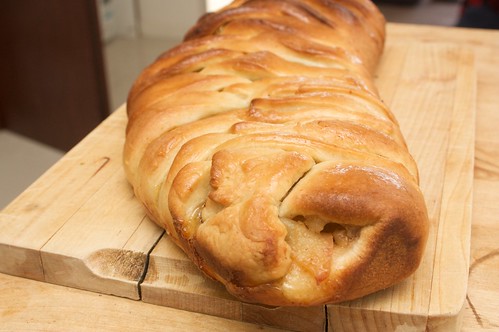
I've never made anything like this before. It was a little bit fiddly but once I got used to working with the dough it all sort of fell in to place, and became a lot of fun. The braiding is cheating, I'm not sure if the way I did it is the way it is supposed to be done.
The dough didn't rise as much as I had hoped it would whilst it was proofing, but it all still turned out okay in the end, and didn't stop the braid from being delicious. I used dry yeast, and next time I do this I will activate it separately in a little warm water before mixing it through, in the hopes that it will work a bit better.
This has made me realise how much work my rolling pin skills require.

apricot and apple braid
modified (and veganised) from my kitchen snippets
dough ingredients
2 heaped cups of baker's flour
1/4 cup of sugar (I used castor sugar)
1/2 teaspoon salt
1 tablespoon dry/powdered yeast
1 chinese soup spoon apple sauce
half ish cup of soy milk
100g melted nuttelex/vegan margarine
filling ingredients
3 green apples (peeled and sliced)
1 heaped tablespoon brown sugar
1 teaspoon cinnamon
quarter cup lemon juice
a smidge of nuttelex
third of a cup of sultanas
some large dollops of apricot jam
plus extra soymilk + apple sauce for glazing
method
To make the dough, mix flour, sugar, salt and yeast (for reference, in future I will mix the yeast with a little sugar and some warm water separately and ten minutes in advance, before progressing with this step). Combine the melted nuttelex with the soy milk and the apple sauce. Then knead it all together! Knead it for at least ten or fifteen minutes, before covering it and putting it in the fridge for the day or over night.
To make the filling (the next day ish), start by soaking the sultanas in a little hot water whilst you prep the apples. Then in a sauce pan melt the nuttelex and throw in the apples with the brown sugar and the cinnamon. After the apples have softened, add the sultanas (drained) and the lemon juice. Smush it all together, then set aside to cool.
Hopefully the dough has risen! Punch it down and knead it some more on a floured surface. Roll it out until it's a giant rectangle, and quite thin (as in, height-wise, not width-wise). Image it divided in to three long thin rectangles, and then cut two centimetre strips in to the two outside rectangles, towards the centre. Check out the pictures in the post at My Kitchen Snippits if you're confused about what I'm describing.

Across the middle, spread all the jam. Put the apple mixture over the top of this, and make sure it's all evenly distributed. From one end, fold in alternating sides so it looks sort of like a plait. Fold at an angle. Plait them as close together as you can - leave too big a gap and the delicious juices run out and cover the bottom of the baking tray and gets all sticky every where. Seal the ends, and leave (covered) to rise for about half an hour to an hour.
Preheat the oven to 175C, glaze the braid with the soy milk + apple sauce combination (just mix the two together well before brushing on), and bake for about half an hour. On fan-forced I only required just under 25 minutes for it to be golden coloured.
Cool then eat.
DELICIOUS.
I've never made anything like this before. It was a little bit fiddly but once I got used to working with the dough it all sort of fell in to place, and became a lot of fun. The braiding is cheating, I'm not sure if the way I did it is the way it is supposed to be done.
The dough didn't rise as much as I had hoped it would whilst it was proofing, but it all still turned out okay in the end, and didn't stop the braid from being delicious. I used dry yeast, and next time I do this I will activate it separately in a little warm water before mixing it through, in the hopes that it will work a bit better.
This has made me realise how much work my rolling pin skills require.
apricot and apple braid
modified (and veganised) from my kitchen snippets
dough ingredients
2 heaped cups of baker's flour
1/4 cup of sugar (I used castor sugar)
1/2 teaspoon salt
1 tablespoon dry/powdered yeast
1 chinese soup spoon apple sauce
half ish cup of soy milk
100g melted nuttelex/vegan margarine
filling ingredients
3 green apples (peeled and sliced)
1 heaped tablespoon brown sugar
1 teaspoon cinnamon
quarter cup lemon juice
a smidge of nuttelex
third of a cup of sultanas
some large dollops of apricot jam
plus extra soymilk + apple sauce for glazing
method
To make the dough, mix flour, sugar, salt and yeast (for reference, in future I will mix the yeast with a little sugar and some warm water separately and ten minutes in advance, before progressing with this step). Combine the melted nuttelex with the soy milk and the apple sauce. Then knead it all together! Knead it for at least ten or fifteen minutes, before covering it and putting it in the fridge for the day or over night.
To make the filling (the next day ish), start by soaking the sultanas in a little hot water whilst you prep the apples. Then in a sauce pan melt the nuttelex and throw in the apples with the brown sugar and the cinnamon. After the apples have softened, add the sultanas (drained) and the lemon juice. Smush it all together, then set aside to cool.
Hopefully the dough has risen! Punch it down and knead it some more on a floured surface. Roll it out until it's a giant rectangle, and quite thin (as in, height-wise, not width-wise). Image it divided in to three long thin rectangles, and then cut two centimetre strips in to the two outside rectangles, towards the centre. Check out the pictures in the post at My Kitchen Snippits if you're confused about what I'm describing.
Across the middle, spread all the jam. Put the apple mixture over the top of this, and make sure it's all evenly distributed. From one end, fold in alternating sides so it looks sort of like a plait. Fold at an angle. Plait them as close together as you can - leave too big a gap and the delicious juices run out and cover the bottom of the baking tray and gets all sticky every where. Seal the ends, and leave (covered) to rise for about half an hour to an hour.
Preheat the oven to 175C, glaze the braid with the soy milk + apple sauce combination (just mix the two together well before brushing on), and bake for about half an hour. On fan-forced I only required just under 25 minutes for it to be golden coloured.
Cool then eat.
DELICIOUS.
Subscribe to:
Comments (Atom)