Showing posts with label baking. Show all posts

Sunday, 21 December 2014

misc christmas party noms

The flattie (Bella) and I hosted a Christmas party last night! We did minimal catering because we were too busy and I only got home at 1700 and our first guest arrived at 1805 (as per our invites), but I did prepare a few things.

I made crunchy chewy clusters, which I've been obsessed with ever since Cindy first introduced me to them (at the same time as I introduced her to If You Are the One, so it was a fair trade). HIGHLY RECOMMEND.

I basically only sort of use Cindy and Michael's recipe, and what I made last night was so amazing that when I tried to pack the last handful away, Ral scooted up to me and shoved them all in his mouth.

I melt 100g of dark chocolate couverture. While it's melting I combine a cup worth of dried fruit, usually goji berries, white mulberries, and 3 or so dried bananas (note these are like liquorice rather than banana chips), diced small, with a third of a cup of cashews. When the chocolate is melted I add a pinch of salt and a third of a cup of desiccated coconut, then mix the fruit and nuts until they're all covered. Put them on a baking tray that has baking paper on it (important! for non-stick), and then fridge them for an hour. Done. Delicious. So much yum.

I also made pizza pinwheels, ginger and five spice biscuits cut into sharks and penguins, and gluten free Swedish jam thumbprint cookies, and that's a recipe I've been using forever and highly recommend.

There's no picture of the food, so here's a picture of us in our Christmas party clothes.


Saturday, 7 December 2013

brazilian carrot cake of deliciousness (with orange and chocolate)

After a week of watching the Great British Bake Off S4 (I love Sue), it was time to bake Danni's birthday cake. It didn't rise super well and there are things I would change, but a friend said "I never liked carrot cake before, but I loved this!",* and I think that's a job well done.

This cake is moist, fragrant when cut into, and retains a beautiful flavour. The carrot, chocolate and orange all work very well together. I would have baked this again immediately but for a sugar, carrot and flour emergency in my kitchen.

This recipe came to me via Cindy, but I changed it up a bit.

Brazilian Carrot Cake (called such because the recipe's original progenitor is Brazilian)

cake ingredients:
2 cups plain flour
1 cup sr flour
1.5 tbl baking powder
pinch salt
1.5 cups sugar (I used a combo brown, coconut and castor due to a dire sugar emergency in my kitchen)
400g carrots, coarsely grated
5 tbl soy milk
3/4 cup vegetable oil
1 tsp vanilla extract
half an orange's juice + zest

chocolate deliciousness for the top:
2 tablespoons cocoa
4 tablespoons sugar
2 tablespoons nuttelex
2 tablespoons soy milk
10g dark chocolate couverture

for on top of the top:
some dark chocolate couverture
a handful of walnuts

to make it a cake:

set ovens to stun180C.
sift together flours, baking powder, salt and sugar. in a blender combine carrots, soy milk, vegetable oil, orange elements and vanilla extract. pulse together until a thick, rough, fluorescent orange goop appears. mix through the dry ingredients.

pour into a greased baking tin, and bake for about 40 minutes; at which point, bake at 170C for another ten minutes. allow to mostly cool.

over a low flame, mix together the elements of the chocolate deliciousness. when it's all melted and smooth, allow to boil for a minute and then take off the heat. put aside to cool for about 5-10 minutes, stirring occasionally.

chop up the walnuts, shave the chocolate. before the chocolate deliciousness can set, pour gently over the cake. top with walnuts and extra chocolate.

serve at your bestie's birthday dinner, and be annoyed when there's none left to eat later because everyone gobbled it up despite being full of burgers.


* where do we think this comma goes? '!",' seems awkward.

Sunday, 13 October 2013

scones

how i spent my sunday night, by stephanie a penguinface (aged 31 and a bit)

a) cooking japchae
b) watching and writing about Serangoon Road (new blog posts on this show occur every Monday morning on my blog No Award; I live tweet my rage at @yiduiqie on Sunday nights)
c) scones (sweet scones are the best okay)

scones are easy and delicious

to make them you need: 2.5 cups of SR flour
one third of a cup of sugar (pref white)
30g marg/nuttelex/etc
half cup milk
half cup water
1tsp apple cider vinegar
half cup sultanas (optional)

extra sugar and flour

add milk + vinegar; set aside.

rub together sugar, flour and marg; add sultanas if you're adding them. make a well, pour in all liquids, mix with a knife or something but don't over mix i learnt this the hard way. flatten out to 2cm (i just pat them with my hands) on a floured surface. cut out (i use a tumbler), sprinkle with the extra sugar, bake at 220C for 15 mins or until golden brown. eat straight away plain or i guess you could use jam or something but why wait.

i've taken to taking out a cup of the flour+sugar+nuttelex mixture so i can make a non-sultana batch of about five for non sultana people eating; so this batch made in total 13.

i'm not saying i accidentally used plain flour this evening and had to desperately try and save it with baking powder but uuhhh see pt d below

d) dancing around the house to Laure Shang (visit that song, you won't regret it).


Tuesday, 3 September 2013

lemon myrtle and macadamia nut biscuits

Last night I used some newly purchased ground lemon myrtle to make lemon myrtle and macadamia biscuits. They were so amazing they were immediately eaten all up, not all by me fiona is also to blame! So sadly there is no photo to share. Lamentably, this means I will simply have to make them again immediately. Maybe gluten-free.

Lemon myrtle is my favourite indigenous Australian spice, and a little bit goes such a very long way. Macadamia is a nut I always forget about, even though it tastes amazing with all sorts of things, and I only ever remember it when I'm passing through the airport and it's filled with macadamia products (because macadamias are Australian and apparently really expensive overseas).

lemon myrtle and macadamia biscuits

you will need:
240g plain white flour
100g sugar (i used raw)
200g margarine + sunflower oil (i used about 150g nuttelex and 50g sunflower oil)
1 tsp baking powder (FLAT)
1 tbl lemon myrtle (FLAT)
comfortable handful of macadamias

oven: 200C

Cream together the sugar with the oily things until looking good and fluffy. Add the flour, baking powder and lemon myrtle, and combine until lovely and smooth. I ended up having to rub it all together with my hands, but that brought it together beautifully. Crush or chop the macadamias and mix into the rest of it. Roll into circles and squash down on baking tray. Bake for 10-13 minutes, depending on how chewy or firm you like your biscuits. I forgot about mine and so they ended up beautiful and brown and fragrant and firm like a rock (though still edible).

I promise to photograph mine next time, but really the most important thing about them is the smell. Baking lemon myrtle is the best.

Monday, 15 July 2013

ginger and chinese five spice cupcakes

My friend Sara-Jane is on the Great Australian Bake Off, so despite my usual reluctance to watch tv I wrote it in my diary, and Tuesday at 8pm found me watching commercial tv with ads and everything. 

This first episode included the challenge 'signature cupcake', which, who has a signature cupcake? If you have one, let me know, because I've never heard of anyone having a signature cupcake. Signature cake, sure (berry and dark chocolate double layer cake, thanks). But signature cupcake? 

So I made one up. And went shopping for ingredients at 10pm, after the show finished. 

Ginger and Chinese Five Spice Cupcakes with Lemon Icing

Someone referred to the ginger and chinese five spice biscuits I bake basically once a week as my 'signature cookies' about two weeks ago, and it's what my mind drifted to when I was considering what would be my signature cupcake. 

what you need:
photo stolen from SJ
2 heaped cups of SR flour
3/4 cups of brown sugar
1 tsp baking powder
3 tbl ground ginger
2 tbl chinese 5 spice
3/4 cup milk
150g margarine
2 tbl light agave or golden syrup
2 chinese soup spoons of apple sauce
1 tsp vanilla essence
handful of crystallised ginger

for the icing
more crystallised ginger (not heaps)
300g icing sugar
2 tsp lemon juice
1/2 tsp vanilla essence
140g marg

what you do:

Oven: 190C

Melt together the margarine, sugar and golden syrup over a low heat. Allow to just melt, then cool a little, before adding in the milk and the vanilla essence. Follow this with the apple sauce and combine. Sift together the flour, baking powder, ginger and five spice. Mix into the liquid until just combined. 

Into lined/greased cupcake pans, spoon a base, and insert one piece of crystallised ginger (i make them smaller), then cover with more batter. Continue until you've got all your cupcakes. 

Bake for about 20 minutes, then allow to cool on a rack. 


Icing: beat together all the icing ingredients except for the crystallised ginger. When the cupcakes are cool, then ice. Chop up the ginger so it's tiny and sprinkle on top. 

Wednesday, 6 March 2013

choc hazelnut cookies

These are a variation on the ginger and five spice cookies that I bake all the time. If you've never tried my ginger and five spice cookies you should give them a go, or ask me to bake them because I love them and I will.

a mix of cookies

Chocolate and Hazelnut Cookies

ingredients
150g bakers flour or SR flour (or combination of the two)
100g coconut butter (or marg/nuttelex)
75g raw sugar
90g light agave/dark agave combo
50g cocoa
halfish teaspoon of bicarb
big handful of hazelnuts, crushed to smallish but not too small

method
Melt the coconut butter, combine with agave and sugar. Add in all the other ingredients (not the hazelnuts), and mix until it's even. Then mix in the hazelnuts. Roll to about a centimetre thick, cut into biscuits. Bake on lined/greased baking tray, and bake for 8 minutes at 180C. Allow to cool (someone I know burned their mouth on these today!), then eat.

Easy peasy.

Wednesday, 23 January 2013

berry and chocolate slice

The super awesome Fi bought the also awesome Danni the Vegan Junk Food cookbook for her birthday, and then it sat on the shelf for a month until I decided something needed to be cooked from it. I was, as I often am, keen to bake something but completely uninterested in leaving the house, so I picked the white chocolate raspberry bars (pg 205), and then modified them to work with what I had in the house and what I felt like.

And they turned out sweet, but excellent. Seriously, so sweet I needed water or black tea to drink with it to offset the sweetness, but if sweetness is your thing please feel free to go with it. 

choc raspberry slice
I used a combination of strawberry, raspberry and mixed berry jams, because that was what I had in the house (there is a surprisingly large amount of jam in my fridge), but I suspect just about any jam would work. I have a pear and blackberry from Babka's that I particularly want to try in it. 

I've tried a couple of other recipes from Vegan Junk Food; book review coming soon!

berry and chocolate slice
modified from the white chocolate and raspberry bars in vegan junk food

you will need:
1 cup sugar
3/4 cup margarine and/or copha
2 tablespoons plain oil (canola or similar)
1 teaspoon vanilla
shake of salt salt
2 and a half cups of flour (I used a mix of plain and baking)
1 teaspoon baking powder
100g chocolate
half cup applesauce 
1 cup of raspberry jam

so then:
Preheat the oven to 175C!

With a fork, beat the sugar, vanilla, oil and margarine (melt the copha if you're using it and be prepared to wait one million years). Add in the flour and mix until crumbly. You may want to use your hands for this. When it's all crumbs, set aside a heaped cup of this mixture. 

Melt the chocolate, and add this and the apple sauce to the bigger portion of the crumb mixture. Mix it all together and then press into a lined square tin.* Bake this for 12 minutes, then remove from the oven, spread the jam over it, and sprinkle with the remaining crumb mix. If you had any more chocolate lying around the house you could put some on top, but I ran out. 

Bake for 25 minutes, and allow to cool completely before cutting. It'll still fall apart a little anyway, but it's better this way. 

Variants: desiccated coconut on top of the crumbly topping.


*I used a circle tin but only because while I was in China my square tin went missing !!!

Tuesday, 22 January 2013

spiced sweet potato and pistachio cake

I wanted to bake something today, and there was half a sweet potato in the house, and I thought, why not? No regrets, it was delicious straight out of the oven and if you give me half a mo, I bet I'll declare it's delicious cold with a cup of tea, too.

sweet potato and pistachio cake

sweet potato and pistachio cake

you will need:
one and a third cups of flour (I used half self-raising and half plain)
1 teaspoon of baking powder
1 teaspoon cinnamon
1 very heaped teaspoon of ground ginger
a shake of salt
a shake of ground cloves
half a teaspoon of nutmeg
an amount of sweet potato that makes 1 - 1.5 cups after it's boiled and mashed
1 cup of sugar (i used castor, but i bet brown or coconut sugar would also work great)
1 teaspoon vanilla essence
one third of a cup of oil (canola or something plain)
two chinese soupspoons of apple sauce
a handful of pistachios.

to make it:
peel, dice and boil sweet potato, then drain and mash. let it cool down a bit (i used this opportunity to read some more blogs). then combine flour, baking powder, spices and salt in a large bowl. in a separate bowl, whisk together the oil and the sugar until combined, then add the vanilla essence and the apple sauce. mix this with the sweet potato until it's a nice consistency, and pour into the dry ingredients. mix until it's just combined, then throw in the pistachios and give it a stir twice more just to get those through.

bake at 180C for about 30 minutes, or until baked through. i used baking paper in my loaf tin.

Tuesday, 1 January 2013

ginger and five spice biscuits

So we went vegmeling to celebrate the end of the year, and one of the things I made were Catherine's Gingernut and Five Spice Biscuits. Well, sort of. And in a few different variations.

ginger and five spice cookies

First I made them in the Friends of the Earth kitchen, using ingredients found in the FoE Melbourne food co-op, which meant all sorts of substitutions. Then, after beautifully and successfully doing that (pictured above), I went home and did it all again, only this time much closer to the original recipe but gluten free, which included sitting on the floor of my kitchen stone grinding star anise for the five spice. 

The gluten-free version, with the original treacle and golden syrup, caramalised the recipe when it was baking and made it crunchy and gingernutty. The FoE version, with its agave syrup and coconut butter, was softer, more like a gingerbread biscuit in texture, and more spicy, I think enhanced by the agave. 

I enjoyed the more original recipe, but I loved my revisions, so I copy them below. 

This recipe is very flexible, it took me over an hour to put together what with constant interruptions in the Co-op, often leaving the batter half mixed in the heat. When it got too gloopy I dropped it in the fridge for five minutes, where it dried out quickly (because I forgot to cover it) but was easier to manage.

For gluten-free, just do a direct orgran's substitute. All good! And make sure your five spice is gluten free - it often isn't, even if it doesn't admit it on the pack. 

Ginger and Five Spice Biscuits
Modified from Catherine

ingredients
200g bakers flour or SR flour (or a combination of the two)
100g coconut butter (originally nuttelex/butter/margarine thing)
75g brown sugar
90g dark agave
30g light agave
2 tablespoons of Chinese five spice mix (mostly this was because I misread teaspoons instead of tablespoons, but I loved the added flavour so kept it)
2 tablespoons of ground ginger
halfish a teaspoon of bicarb

method
Melt the cocoa butter, and combine with the agave and the sugar. Add in all the other ingredients, and mix so it's even. Roll the biscuits to about a centimetre thick, and cut out into biscuits (I used a glass tumblr). Place on a lined or greased baking tray, and bake for 9-12 minutes at 180C. Allow to cool, then eat. 

After much deliberation and consultation with other people in the co-op that day, I elected to put a pistachio nut into the centre of each biscuit. You could also use a sultana or a goji berry or anything like that. Or elect not to put in anything. 

Monday, 24 September 2012

Black Forest Cheezecake + a Birthday Picnic

Recently Planet Vegmel turned three! To celebrate there was a picnic at the Edinburgh Gardens, as well as our favourite new tradition of making a zine. This year's zine features secrets of not the inner North, and you should all download it!

I made the super awesome vausage rolls because I really wanted Wendy to try them (having spent the last six months in Beijing talking them up to her), but this meant bringing a gluteny savoury that K couldn't eat! To compensate, I went to extra special effort with my sweets contribution: vegan, gluten-free black forest cheezecake.

black forest cheezecake

This recipe was inspired by a piece of cake I had at the Heavenly Plate on a recent trip to Perth which was amazing and I was so excited to try making some sort of black forest cheezecake myself. This version isn't quite right, there are several changes I have in mind for the next iteration, but for a first attempt (and my first cheezecake in over a year) it was not bad at all.

I used the triple threat chocolate cheesecake in My Sweet Vegan as inspiration/guidance for proportions.

black forest cheezecake

ingredients

1 packet of chocolate biscuits (I used the leda tim tam substitutes)
third of a cup of sugar (I used a mix of white and coconut sugars)
two tablespoons margarine


3 tubs of vegan cream cheese (approx 700g)
300g silken tofu
300g dark chocolate
three quarters of a cup of white sugar
1 tablespoon vanilla extract
shake of salt

a can of berries, preferably cherries but mixed will do
1 tablespoon lemon juice
1 tablespoon cornstarch
quarter cup sugar
extra chocolate for drizzling

method

Crush the biscuits, mix with the third of a cup of sugar and the margarine. Add some extra chocolate in the form of cocoa if you like. Press into a lined 22 cm cheesecake or springform pan for a thin crust, or a smaller pan for a slightly thicker crust.

Mix together the cream cheese, tofu, vanilla extract, salt and the three quarter cup of sugar until smooth. Melt the chocolate and combine through until looking delightfully brown. Pour carefully into pan on top of crust, and drop the pan a time or two to smooth it out if necessary. Bake at 175C for about 50 minutes.

After it has cooled (I usually do this overnight), over heat bring together the can of berries (mostly drained, but with a little of the syrup), the cornstarch and the lemon juice with the remaining sugar. Stir over heat until it's come together like a jam, and let cool a bit. Then pour it over the cake. When this has cooled a little more, melt the remaining chocolate and drizzle it over. Serve and eat it, it's so good.

Changes I would like to make in the future: an extra berry layer on top of the base; a thicker base (maybe half again); something "white creamish" like a real black forest cake (maybe a white chocolate tofu layer); fresh cherries on top.

Tuesday, 20 September 2011

chocolate caramel slice

For the Planet VegMel Picnic (more on the picnic later) I made chocolate caramel slice, originally seen on Johanna's blog. I had quite a different experience than Johanna. She worried that the base was too crumbly, that she might have overcooked the milk because it didn't look right, and too liquidy a chocolate layer. I on the other hand had a lovely time. The base pressed in quite well, and I've never used condensed milk of either the dairy or soy variety previously, so had no idea if it was working and just went with it; and the chocolate was a perfect consistency. And it turned out well! Very crunchy, and the base was a bit high (I used a 20x20cm tin instead of 20x30, and that was a mistake), but overall it was an easy and delicious experience. And at the end of the picnic there was only one lonely piece of slice left!

I also made this gluten free, with a direct substitution of Orgran's GF flour for the flour in Johanna's recipe. I didn't even add extra liquid the way I usually would with a GF conversion, and it turned out just fine.

This is a picnic submission for that recipe seems very familiar...

caramel chocolate slice


chocolate caramel slice
originally at Green Gourmet Giraffe

base
1 cup dessicated coconut
1 cup brown sugar
quarter of a container of nuttelex (125ish grams)
1 cup GF flour

caramel layer
330g soy condensed milk (or 1 tin)
2 tablespoons or so of golden syrup (I didn't measure, just squeezed the tube until I got bored of squeezing)
30g nuttelex

chocolate topping
150g dark chocolate
1 tablespoon vegetable oil

Base: mix all the ingredients and press into a lined tin. Bake at 180C for 15-20 minutes.

While the base is in the oven, in a small saucepan over a lowish medium heat, constantly stir all of the caramel ingredients until it has thickened and is a light golden brown. Hopefully the base will be ready just as the caramel is, because then you can pull it out, spread the caramel over it, and shove it back in the oven. At the same 180C temperature, bake for 10 or so minutes until it's a deep golden brown. Mine went very brown, but it wasn't burnt and it was all okay. Set this aside to cool and go about your business.

When it's cool, melt the chocolate and mix in the oil. Spread it over the caramel layer, and leave it in the fridge to set. I left mine over night. I then brought it to room temperature before cutting.

Cut it small because it's quite sweet!

Thursday, 15 September 2011

ninja bread wars: a diptych

the ninja wars


a ninja good time


made using the ppk recipe for gingerbread, staging by Danni and Emilly

Tuesday, 6 September 2011

lemon snickerdoodles

Over the weekend I was compelled to provide some sort of baked treat for a short-notice afternoon tea, and remembered this lemony snickerdoodle recipe that was originally posted by Em. A quick glance revealed I had all the required ingredients and, clad in my pyjamas, I felt ready to tackle this baking need.

lemon snickerdoodles


I made a few modifications to this recipe. Chief amongst them is that I didn't finish with lemon icing, it was more of a lemon glaze - I suspect that the '3/4 of a lemon' that Em used was a little smaller than the lemon I picked up from the corner shop, because I tripled the icing sugar in the recipe and it was still gloopy. I ended up brushing the glaze onto the snickerdoodles, but don't fret - it all ended well. And now I have three quarters of a cup of lemon glaze in my fridge, if anyone has any ideas.

These went pretty soft very quickly - good for the day of, but not as amazing by the end of the second day. Just have to eat them quickly, what a hardship!

This is my second submission for the that recipe seems very familiar... blog event.

lemon snickerdoodles
originally from sugar spoons, modified from vegetarian times

the dough
1 3/4 cup plain flour
1/4 cornflour
1 teaspoon baking powder
30 grams nuttelex, softened
a smidge over a quarter of a cup of soy milk (with a few drops of vanilla extract mixed through)
1 teaspoon vanilla essence
quarter cup castor sugar
1 teaspoon cinnamon

the glaze
zest + juice of most of a medium to large lemon
a whole lot of icing sugar

method
Preheat the oven to 180C. Em suggested lining one baking tray, but I needed two (and got about 20 snickerdoodles out of it).

Beat together the nuttelex until it's soft, then beat in the sugar, followed by soymilk and vanilla essence. In a separate bowl, mix together the flour, corn flour and baking powder, then slowly mix this all into the liquids until smooth. You may need to use your hands! Set aside to sit for ten minutes.

In a bowl, combine the sugar and cinnamon.

Form the dough into 1 inch balls, roll into the cinnamon sugar, and place it on the tray. Flatten the cookies! Bake for 12-15 minutes, until the cookies are starting to go a little golden. Transfer to a cooling rack and let cool for a bit.

Make the glaze! Combine lemon zest, lemon juice, and icing sugar until you're happy with the consistency. Brush (or dollop, if it's thick enough) onto the snickerdoodles, then sprinkle any remaining cinnamon sugar on top.

Saturday, 3 September 2011

potato boston bun

When Emilly and I were invited to dinner with Ger + Em and asked to provide some dessert at short notice, I was stricken with indecision. But with the blog event for VegMel's 2nd birthday, it seemed fortuitous to tackle one of the recipes I've had bookmarked for months.

a boston bunening


My first recipe for the birthday blog event (you should participate too!) is this potato boston bun recipe, first blogged by Johanna at Green Gourmet Giraffe. Ever since Johanna first posted it, I had been intrigued and definitely willing to give it a go. I love boston buns, and I love potatoes, how could this not be a great combination?

I made only a few minor mods to this recipe, increasing a few proportions and decreasing a few others, but mostly keeping it all the same. It was delicious on the day, and still delicious this morning, with a little nuttelex.

potato boston bun
based on the recipe at Green Gourmet Giraffe, originally from the ABC

ingredients for the bun
2 small white potatoes, peeled and mashed
three quarters of a cup of castor sugar
2 cups self raising flower
1 cup soy milk
1 teaspoon mixed spice
1 cup mixed fruit

ingredients for the icing
three quarters of a cup of icing sugar
three quarters of a cup of desiccated coconut
a few drops of vanilla essence
2 tablespoons of hot or even warmwater
1 tablespoon nuttelex

the method of bunening
Preheat the oven to 200C.

Mix together the potato and the sugar. Mix in the flour, mixed spice, and soy milk. When it's all smooth (though there can be a few potato lumps), add the fruit and loosely combine. Pour into a lined circular tin and smooth the top around.

Bake for about 50 mins until golden brown and firm to the touch. When you put the skewer in to test, it can be a little not-quite done, it'll cool deliciously.

Remove from tin and allow to cool.

For the icing, mix together the icing sugar, coconut, vanilla essence, nuttelex and the hot water. Mix it thoroughly until a spreadable paste is formed. Add more hot water if necessary. Spread it over the top of the bun.

Cut and eat, oh yeah.

Sunday, 22 May 2011

(not actually a) mississipi mudcake

Following a discussion around the existence of vegan mudcake, I was provoked in to committing acts of the same, guided by this Mississippi mudcake recipe on vegweb, and goaded on by Certain Vegans.

not actually a mud cake

This cake was good. It had a lovely flavour, lovely consistency and texture and was easy to bake and held up well over a few days, but it was not mudcake. It was too light and fluffy and not filled with any molten chocolate at all! However it is a recipe I would repeat, and I have ideas for transforming it in to mudcake.

I made no mods! Which is terribly unlike me.

Wednesday, 4 May 2011

home cooked perth noms

The other thing I do when I'm in Perth is eat things that people cook especially for me.

Welsh cakes


I don't know how to describe my levels of excitement when these Welsh cakes appeared in front of me! I went for afternoon tea with the Ex-Laws, and Nan went to experimental lengths to make me vegan Welsh cakes, and apparently they were just as they should be! Certainly I found them just as they should be (delicious), and had to fend off non-vegan interlopers who could have had their pick of the raspberry slice she'd brought, or the cupcakes already there, and instead tried to eat all my Welsh cakes. They were SUPER DELICIOUS, I will have more please!

CKT


On my first night at my parents' house I was way too tired (after five days in the con hotel with (surprise!) not a lot of sleep) to actually go out for dinner, so I requested my mother make CKT for dinner. Which she did! I love it when my mum makes CKT, she makes a portion for every person because everyone wants it slightly different. But this means sometimes she forgets things from batch to batch: in my case, chilli.

Curries


On my last night staying with my parents, we decided to cook some curries and things. Featured here are a vegetable curry (cooked by mum); a chana masala (cooked by me); and some gailan and mushrooms. OH YEAH this is one of my favourite meal sets.

Thanks, Perth! As always you were delicious.

Wednesday, 27 April 2011

mini cheezecakes

I went on a picnic and baked some mini cheezecakes (as the birthday girl didn't want an actual cake).

mini cheesecakes

These cakes were coincidentally based on the cheezecake I baked for Em last year, but why change a delicious cake? I love this cheezecake a lot, and I've been a bit obsessed with mini things lately, so it seemed like a good time to give them a go.

I only needed about three quarters of the biscuit base mixture, so it's a shame I accidentally poured the whole packet in to get mushed, as there is now a whole heap of biscuit mixture in my fridge! I pressed about five millimetres of biscuit in to the cupcake containers. A note: use foil cups ONLY. Do not use paper cups. It will end in tears and recriminations when you go to eat it the next day.

Other than that alle the ingredients remained the same. I poured the cake filling in to the cake cups, on top of the bases, and put in to bake at 180C for a while. Then I let them cool completely, and made the berry compote and poured it on top. Rich, delicious success!

The picnic was lots of fun, it was a perfect day for it. Shar brought soup, which was super delicious, and Danni made the most successful pizza ever. And there was scrabble! And surprisingly I enjoyed watching season one of Friends.

Monday, 18 April 2011

baking from babycakes

I've been a little bit intrigued by Babycakes ever since I first heard of it; however I have little chance of visiting the shop any time in the near future, so it was with delight that I borrowed the Babycakes cookbook from Emilly.

gingerbread cake from the babycakes cookbook

I've tried baking two things so far. The first was the gingerbread cake, which I first tried at Emilly's birthday. I was taken by how moist and delicious this cake was. The added pumpkin makes it really moist. I cheated and made a very sugary cream cheese topping instead of making the frosting in the book, but the cream cheese complemented it quite well.

The cake itself was tasty, but it dried out very quickly, which is a shame as it makes quite a lot, so there was a lot to get through.

apple and cinnamon muffins from the babycakes cookbook
look at all that spare apple!

I followed this up with the apple and cinnamon muffins. I get really grumpy at recipes like this, where they tell you to do something (roast eight apples) and then you only use a portion of the end product (one cup of roasted apples). It is a good thing I was feeling lazy and only ended up roasting five apples.

There were other modifications I made as I went on, most of them already written in pencil in the cookbook; significantly reduced the amount of agave and the amount of vanilla essence (two tablespoons!), and some other modifications I cannot recall as the book is not in front of me.

Overall I've found the book a tasty experience so far, though of course I will require more testing in order to truely guage how I feel about the book.

Friday, 18 March 2011

brownie things

I don't know how universal an experience this is, but when I was a kid I used to love going to Pizza Hut where they had all you can eat, and when it came time for dessert I would always get a square of chocolate cake, and I'd cover it in soft serve ice cream and marshmallows.

This brownie tastes like that cake, and I'm okay with that.

brownies like at pizza hut

brownies like at pizza hut (australia, circa 1992)

ingredients
two cups of plain flour
almost one cup of cocoa (I ran out)
one cup of castor sugar
shake of salt
one tablespoon baking powder
two or three tablespoons of canola oil
two and a bit cups of rice milk
one teaspoon lemon juice
quarter cup walnut pieces
quarter cup choc chips

some extra milk and choc chips to make the ganache/icing

method
Combine flour, cocoa, sugar, salt and baking powder. When it's all nicely mixed and the cocoa isn't clumping, gradually add in the milk, oil and lemon juice. Mix it all until it's smooth, then add in the walnuts and choc chips.

Pour in to a lined baking tin (I used 20cm x 20cm and it was perfect), and bake at 180C for about 25 or 30 minutes.

Let the brownies cool for a few minutes in the tray, then on a cooling rack. When it's getting pretty cool, heat a quarter cup of milk in the microwave in five or ten second bursts until it's warm, then pour in about a quarter cup of choc chips. If it's not chocolatey enough for you, add some more, and keep mixing until they're all melted. Set aside to cool for ten minutes, then pour/spread over brownie slab. Cut and eat.

Friday, 4 March 2011

oreo cheezecake

Two weeks ago when I was in Perth I went out for lunch to The Royal, and Chris and Nick ordered the Oreo chocolate cake (...for dessert, not for their mains), and it was a solid chocolate cake with some sort of cream filling and a chocolate ganache, with an Oreo perched on top. Neither of them managed to finish these monstrosities, and I started pondering vegan takes on this. And then earlier this week Lisa tweeted a picture of a vegan Oreo cheesecake, and I started thinking about that. So I've had Oreos on the mind recently (I started dropping hints at Cupcake Central, and there's talk that they'll make a vegan cookies and cream).

oreos

So I decided to give something a go, and here's what happened. All the recipes, vegan and non-vegan, suggested using one pack of Oreos for the base. This was a giant lie, and also had me fretting around the internet about what I should do with the filling (most common solution: eat it; surprisingly not the solution with which I went). I managed to crack my favourite mixing bowl (never mind that it's at least five years old, plastic, and cost five bucks from Crazy Clarks). I spilt sugar all over the kitchen. I finally wrestled the cake in to the oven, and then when I pulled it out I was convinced I had burnt it. But after all that effort, I decided to glaze the thing, and if it failed then it failed.

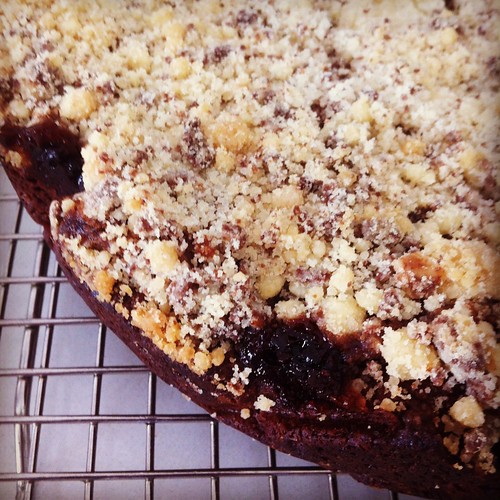
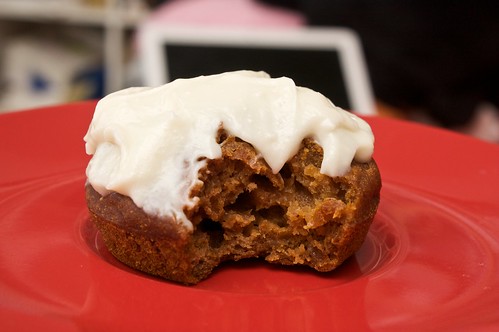
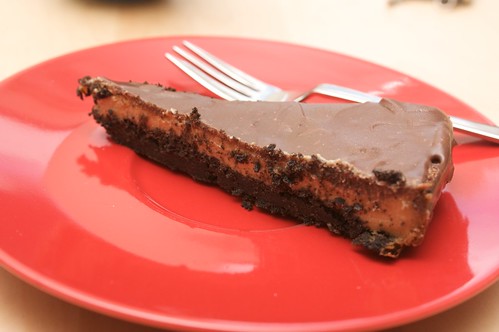
Here's the surprising thing: it was delicious. I've been eating it all week. It's very rich, and I would make some modifications to it, but it worked, and mostly I'm happy with it.

oreo cheezecake

oreo cheezecake

ingredients
2 packets of oreos (or 1 packet of plain chocolate biscuits + 1 pack oreos)
quarter cup of melted margarine/Nuttelex
quarter cup sugar

2 x 250ish packs of vegan cream cheese
half a heaped cup of castor sugar
half a heaped cup of coconut sugar (you can use another half cup of castor if you don't have coconut sugar)
1 tablespoon plain flour
2 tablespoons lemon juice
3 egg replacers (I used applesauce)
dash vanilla essence

quarter cup soy milk
heaped half cup of chocolate chips
some golden syrup (just over a tablespoon)

the method
to make 
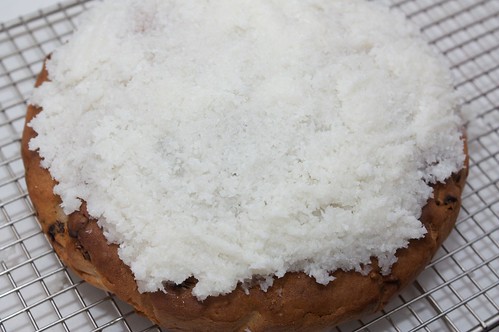
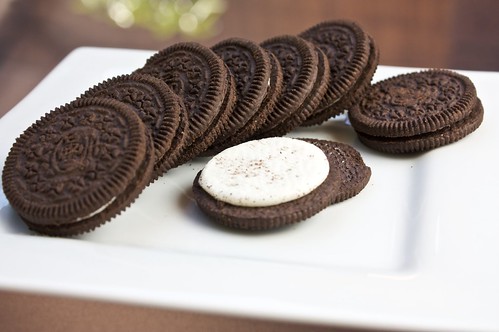
the base, grind up one and a half packs of biscuits. I used chocolate oreos, and added the filling to the mixture (but when I used plain Oreos, I harvested the filling and only used the biscuits). Melt the margarine and pour in to the mashed up biscuits, along with the quarter cup of sugar. Mix until combined, then press in to a lined spring form or cheesecake pan.

Preheat the oven! Somewhere up about 280C.

To make the filling, beat together cream cheese, sugar, flour, lemon juice, egg replacer and vanilla essence. Also add any left over Oreo filling you might have harvested from the Oreo bases. You may also want to crush up some more Oreos and add them to the filling if it takes your fancy. When it's smooth, pour it in to the base. Drop it a little if you have too many lumps. Just a note - if you do add the Oreo fillings to this, it will be lumpy. Don't worry, it will seep into the mixture with no problems.

Shove it in the oven for 9 minutes, then reduce the temperature to about 90C and leave to bake for another 30 - 35 minutes. It'll be a bit brown on top, but don't let it burn.

For 
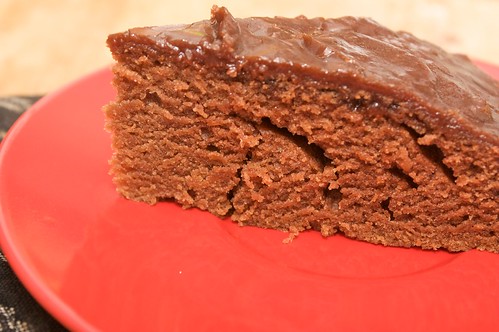
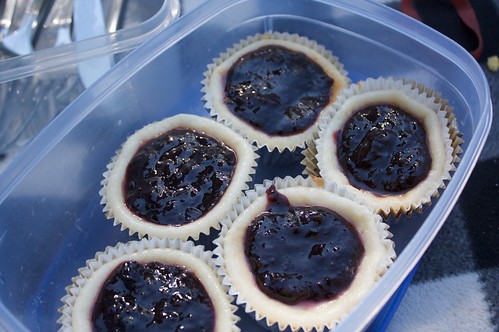
the ganache: pull it out and set it aside to cool. Some fridge time is preferable. When it's nicely set (at least an hour in the fridge), bring the soy milk to the boil, then remove from the heat and add the choc chips and the golden syrup. Stir this until the chocolate melts. Let it cool for ten minutes, then spread it around the cake.

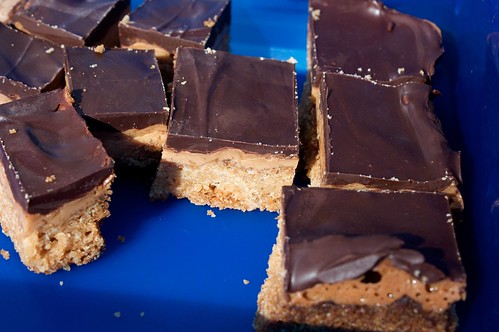
Let it all cool, then it is ready to go. It's pretty rich, so maybe don't be too generous with the first cut.